Besides using Jax-RS, you can also develop a REST service as a Groovy script in your own extension that will be loaded at startup by the REST engine.
To do this, you first need to have your own extension project as described in Creating your extension project. The below process will instruct how to write a simple Groovy REST script in your own extension and make it work in eXo Platform.
Create a Groovy script named
custom-extension.war!/WEB-INF/groovy/demo/GroovyRest.groovywith the simple content:// simple groovy script
import javax.ws.rs.Path
import javax.ws.rs.GET
import javax.ws.rs.PathParam
@Path("/groovyrest")
public class GroovyRest {
@GET
@Path("helloworld/{name}")
public String hello(@PathParam("name") String name) {
return "Hello " + name
}
}
Declare the Groovy file in the
custom-extension.war!/WEB-INF/conf/configuration.xmlfile.<?xml version="1.0" encoding="ISO-8859-1"?>
<configuration>
<external-component-plugins>
<target-component>org.exoplatform.platform.gadget.services.GroovyScript2RestLoader.GroovyScript2RestLoaderExt</target-component>
<component-plugin>
<name>test</name>
<set-method>addPlugin</set-method>
<type>org.exoplatform.services.jcr.ext.script.groovy.GroovyScript2RestLoaderPlugin</type>
<init-params>
<value-param>
<name>workspace</name>
<value>portal-system</value>
</value-param>
<value-param>
<name>node</name>
<value>/exo:gadget-groovy</value>
</value-param>
<properties-param>
<name>GroovyRest.groovy</name>
<property name="autoload" value="true" />
<property name="path" value="war:/groovy/demo/GroovyRest.groovy" />
</properties-param>
</init-params>
</component-plugin>
</external-component-plugins>
</configuration>
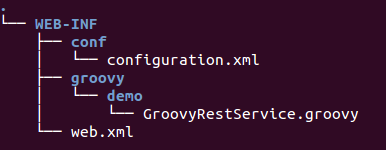
The war custom-extension now looks like:
Deploy your custom-extension into eXo Platform by putting
custom-extension.warin thewebappsfolder andcustom-extension-config.jarin thelibfolder. See details about Registering your extension manually or Registering your extension with script for both Tomcat and JBoss.Start eXo Platform, then go to http://mycompany.com:8080/portal/rest/groovyrest/helloworld/eXo. The output (Hello eXo) will be shown.