Creating a gadget is very simple. To create a gadget through a Webapp, you need to create a sample bundle where you will add and deploy your gadget. This procedure walks you through steps to create a very simple gadget called Hello World. The source code of this gadget is provided here for downloading.
Add a very basic
pom.xmlfile to your new Maven project as follows:<project xmlns="http://maven.apache.org/POM/4.0.0" xmlns:xsi="http://www.w3.org/2001/XMLSchema-instance" xsi:schemaLocation="http://maven.apache.org/POM/4.0.0 http://maven.apache.org/maven-v4_0_0.xsd">
<modelVersion>4.0.0</modelVersion>
<groupId>sample</groupId>
<artifactId>gadget</artifactId>
<packaging>war</packaging>
<version>1.0</version>
<name>Hello Gadget sample</name>
<build>
<finalName>hello-gadget</finalName>
</build>
</project>
Add a very basic
web.xmlfile to thesrc/main/webapp/WEB-INFdirectory of your project:<?xml version="1.0" encoding="UTF-8"?>
<web-app version="3.0" metadata-complete="true"
xmlns="http://java.sun.com/xml/ns/javaee" xmlns:xsi="http://www.w3.org/2001/XMLSchema-instance"
xsi:schemaLocation="http://java.sun.com/xml/ns/javaee http://java.sun.com/xml/ns/javaee/web-app_3_0.xsd">
<display-name>hello-gadget</display-name>
</web-app>
Add the following content to the
HelloGadget.xmlunder thesrc/main/webapp/gadgets/HelloGadgetdirectory:<?xml version="1.0" encoding="UTF-8"?>
<Module>
<ModulePrefs author="eXoPlatform"
title="Hello World"
directory_title="Hello World"
description="The simplest gadget">
</ModulePrefs>
<Content type="html">
<![CDATA[
<div class='hello'>
<h2>Hello</h2>
<h6>Welcome to Hello World gadget!</h6>
<p><i>Powered by eXo Platform.</i></p>
</div>
]]>
</Content>
</Module>
Add the following content to the
gadget.xmlfile under thesrc/main/webapp/WEB-INFdirectory:<gadgets
xmlns:xsi="http://www.w3.org/2001/XMLSchema-instance"
xsi:schemaLocation="http://www.gatein.org/xml/ns/gatein_objects_1_0 http://www.gatein.org/xml/ns/gadgets_1_0"
xmlns="http://www.gatein.org/xml/ns/gadgets_1_0">
<gadget name="HelloGadget">
<path>/gadgets/HelloGadget/HelloGadget.xml</path>
</gadget>
</gadgets>
Create the target war with the Maven command:
mvn clean install.Follow custom-extension section to create
custom-extension-config.jarthat declares the hello-gadget.war as a portal dependency.Deploy the
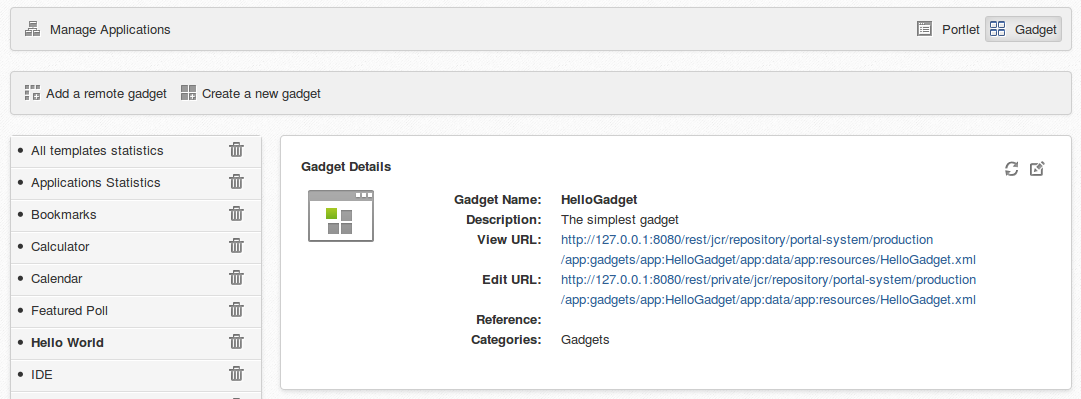
hello-gadget.warandcustom-extension-config.jarfiles into the deployment folders where you unpacked the eXo Platform installation.Select → , then add this gadget into a specific category to bring it in use:
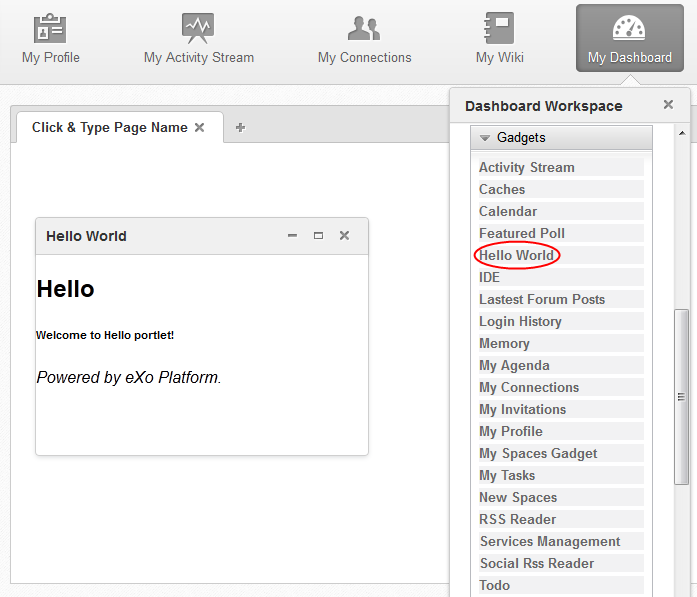
Go to the Dashboard to insert the gadget in the page. Open the Dashboard Workspace by clicking the Add Gadgets link and choose the Hello World gadget. The result is as below:
Note
Besides creating a gadget through a Webapp, you can also perform through UI.