Warning
You are looking at documentation for an older release. Not what you want? See the current release documentation.
Registration will be detailed for each OAuth provider. But in all cases, the provider will give you a pair of Client ID/Secret needed for later configuration.
Note
Pay attention to the Redirect URL that should match your server host and port. In the below instructions, it is assumed that your host is server.local.network.com.
Go to https://developers.facebook.com/apps and register as a Facebook developer if not yet.
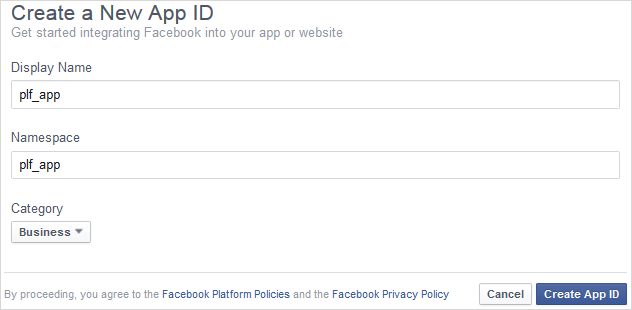
Click Create a New App. Here, enter Display Name, Namespace and select one Category, then click .
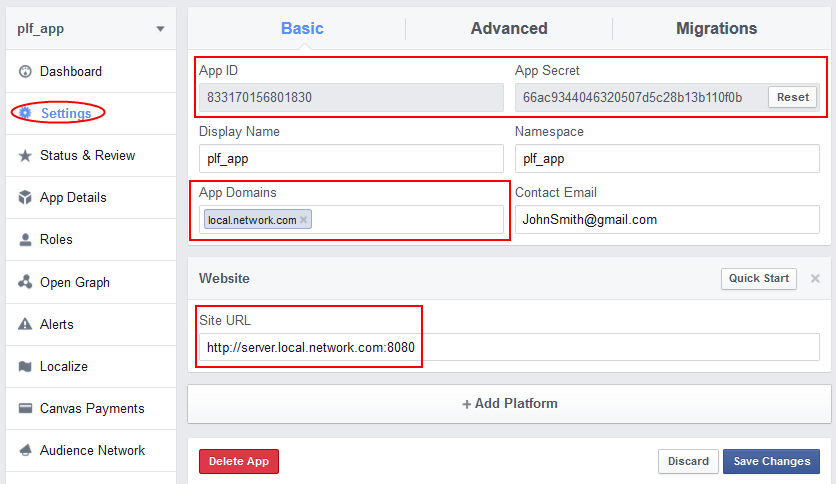
In your created application, select Settings. Here, input the values:
local.network.com for App Domains.
http://server.local.network.com:8080 for Site URL (by selecting → ).
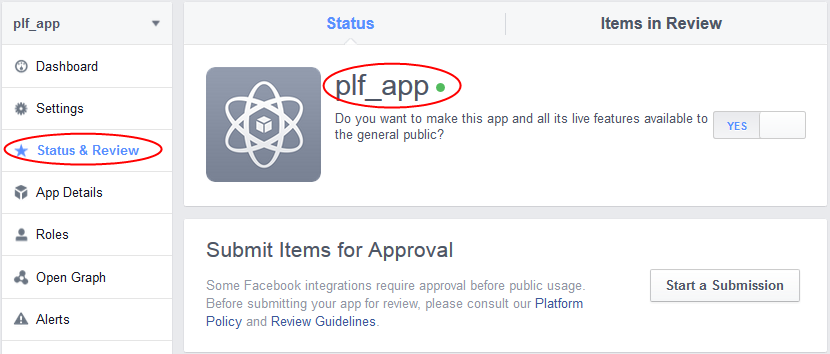
Before going to the production environment, you need to disable the development mode in your registered application. If not, your application is available only for you, your developers and users created for your application.
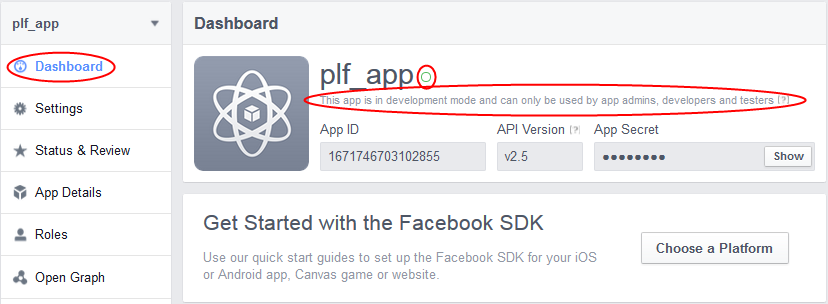
To switch the development mode to the public one, go to Status & Review, then click
 → .
→ .
Go to the Twitter Developer page. From this page, go to the Manage Your Apps page (in the TOOLS category near the bottom), then register your application by clicking Create New App.
Fill values for Name and Description. Use http://server.local.network.com:8080 and http://server.local.network.com:8080/portal/twitterAuth for Website and Callback URL respectively.
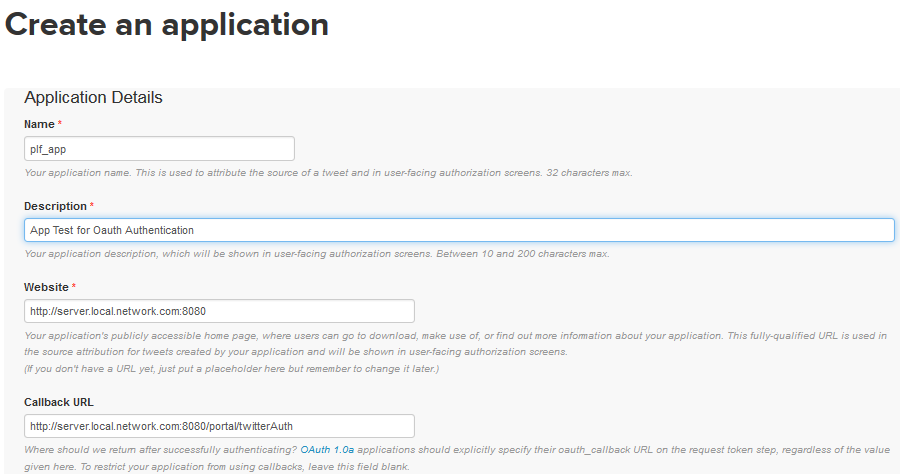
Note
The "Callback URL" must be filled for Twitter to recognize that it is a web application which is trying to connect. Twitter will not accept "http://localhost:8080/portal" as a valid URL but you can use any, even "http://www.twitter.com". This field will be ignored but it cannot be left empty.
In the created application, optionally edit it. In the Settings tab, you may need to enable the Sign in with Twitter feature (by ticking the Allow this application to be used to Sign in with Twitter checkbox). It is recommended you enable it, otherwise your users will need to authorize in Twitter after each login into eXo Platform. For the Access option, the default value as Read only is sufficient.
After finishing the whole process, you should see in the Details tab as below:
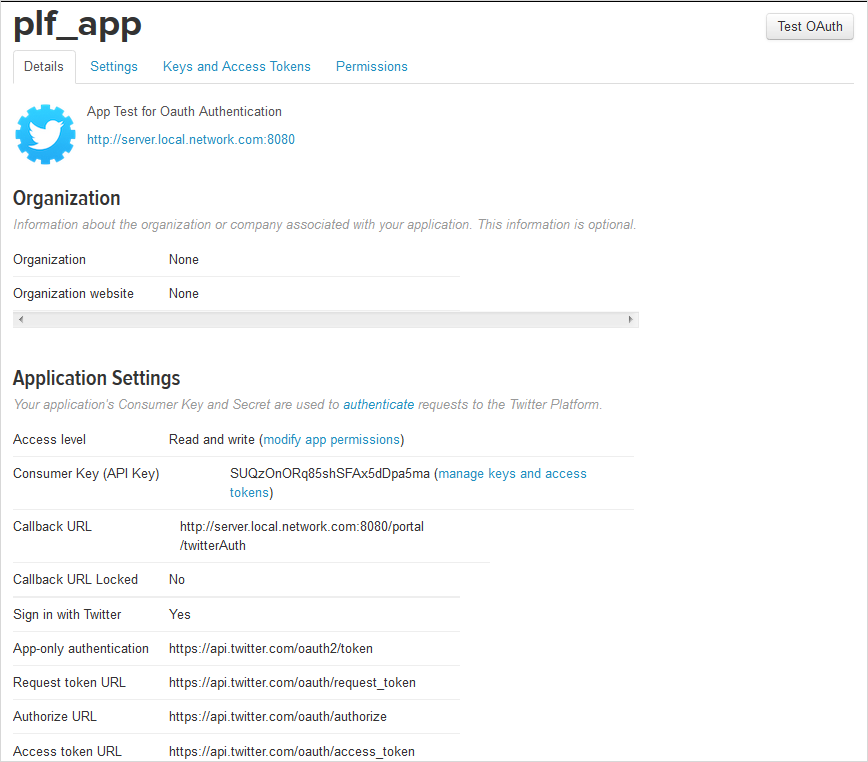
Consumer Key and Consumer Secret (in Keys and Access Token tab) will be used to configure Client ID and Client Secret later.
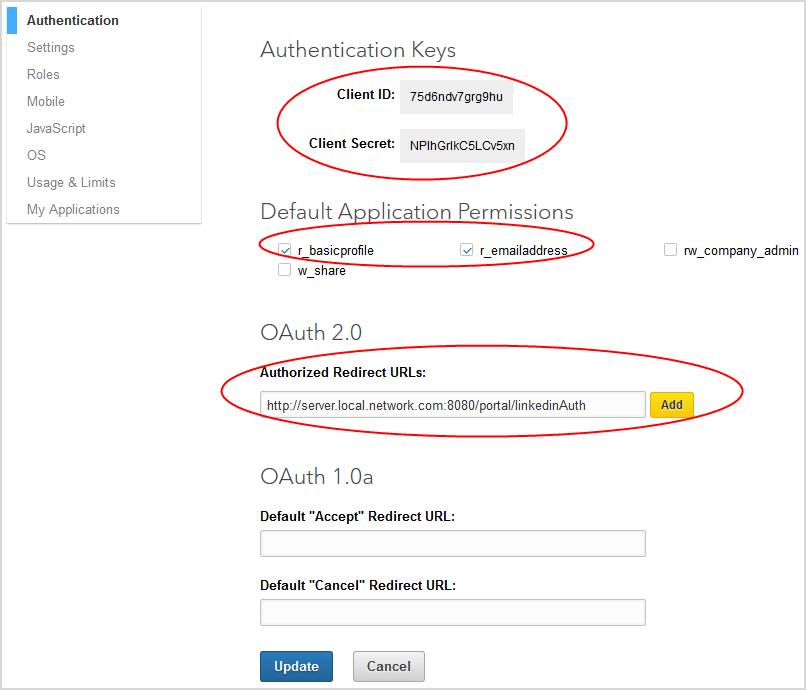
Go to https://www.linkedin.com/developer/apps/. From this page, register your application by selecting Create Application.
Fill values for Name, Description, Application Logo URL, Application User, Business Email and Business Phone. For Website URL, enter http://server.local.network.com:8080.
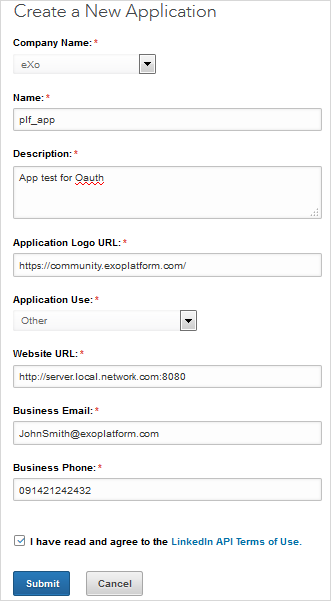
Click Submit.
In the Authentication part, tick two checkboxes: r_basicprofile and r_emailaddress, then input http://server.local.network.com:8080/portal/linkedinAuth for the Authorized Redirect URLs field and click .
Google+
Go to the https://developers.google.com/. Here, access the Google Developers Console page (in the Developer Consoles category near the bottom) and register as Google developer if not yet.
Create your project first, then go to it.
In the → → , make sure Google+ API is enabled.
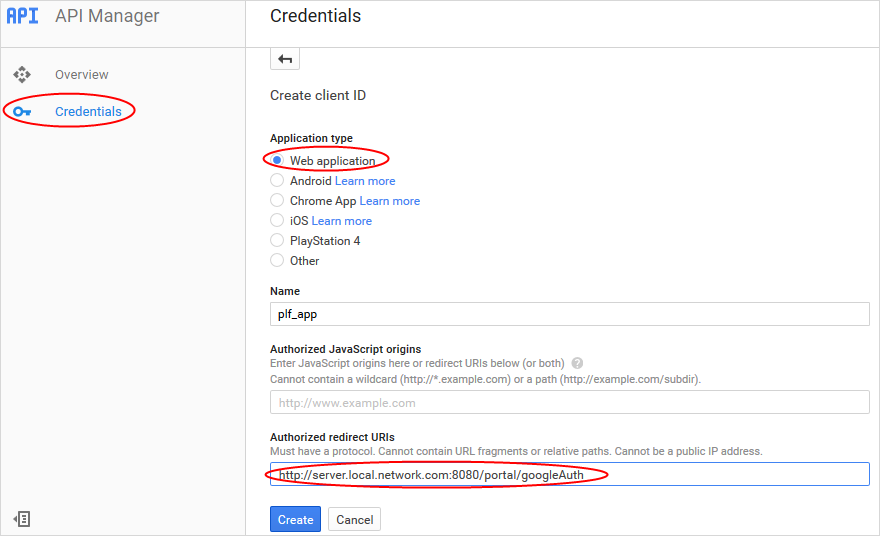
In the Credentials part, click and select Oauth 2.0 client ID.

Select Web application. In the Authorized redirect URIs field, input http://server.local.network.com:8080/portal/googleAuth.
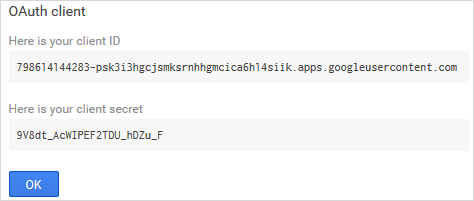
Click and view information of Client ID, Client Secret and Redirect URIs.