Warning
You are looking at documentation for an older release. Not what you want? See the current release documentation.
In eXo Platform, there are 2 modes of WebDAV:
Public: Login is not required, and users can view all the public items. The URL to access will be: http://mycompany.com:port/rest/jcr/{RepositoryName}/{WorkspaceName}/{Path} or dav://mycompany.com:port/rest/jcr/{RepositoryName}/{WorkspaceName}/{Path}.
Private: Login is required, and users can view all the items which they had access right. The URL to access will be: http://mycompany.com:port/rest/private/jcr/{RepositoryName}/{WorkspaceName}/{Path} or dav://mycompany.com:port/rest/private/jcr/{RepositoryName}/{WorkspaceName}/{Path}.
In which:
mycompany.com:port: The URL of your site.
RepositoryName: The repository name.
WorkspaceName: The workspace name.
path: The path of the content.
The access to your workspace via various WebDAV clients is not the same. This part will give instructions about using WebDAV over a web browser and common WebDAV clients. It is assumed that you want to access the Wiki Home of the "Support Team" space, do as follows:
Over a web browser:
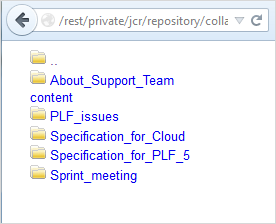
Simply enter http://mycompany.com:port/rest/private/jcr/repository/collaboration/Groups/spaces/support_team/ApplicationData/eXoWiki/WikiHome into the address bar of your browser. The selected content will be shown in WebDAV as below:
Nautilus (Linux):
Open Nautilus - the file manager (GNOME Files), then open the address bar (by using the hot key: Ctrl + L).
Enter dav://mycompany.com:8080/rest/private/jcr/repository/collaboration/Groups/spaces/support_team/ApplicationData/eXoWiki/WikiHome into the address bar.
Enter your username and password in the login form.
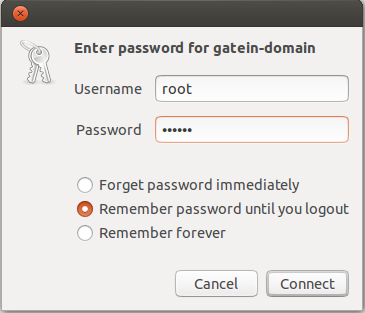
Click Connect. You will be redirected to the Wiki Home window as below:

Windows Explorer (Windows 7):
Open the Computer window, then click Map network drive.

Select any available letter for the drive in the Drive list.
Enter http://mycompany.com:8080/rest/private/jcr/repository/collaboration/Groups/spaces/support_team/ApplicationData/eXoWiki/WikiHome into the Folder field.
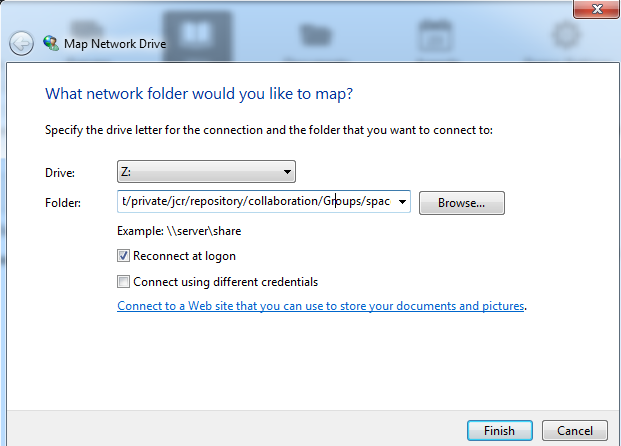
Select the Reconnect at logon checkbox to connect every time you log onto your computer.
Click Finish, then enter your username and password into the Windows Security pop-up, and click OK to connect. You will be redirected to the Wiki Home window.
Note
If you still do not connect successfully, check if you have followed instructions in WebDAV restrictions.
Windows Explorer (Windows 8):
The procedure to set up a web folder by "mapping a network drive" through My Computer in Windows 8 is quite similar to that in Windows 7. Note that you need to point to the down pointer at the upper-right corner of the Computer windows to show Map network drive.
Note
If you still do not connect successfully, check if you have followed instructions in WebDAV restrictions.
Windows Explorer (Windows XP):
Navigate to the My Network Places.
Click the Add a network place link on the left to open the Add Network Place Wizard.

Click Next to select a network location.
Select Choose another network location to create a shortcut, then click Next.
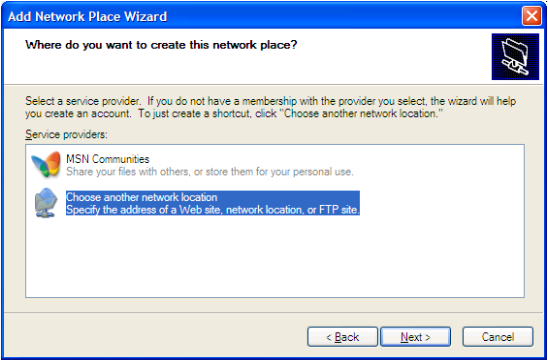
Enter http://mycompany.com:8080/rest/private/jcr/repository/collaboration/Groups/spaces/support_team/ApplicationData/eXoWiki/WikiHome into the Internet or network address field, then click Next.
Enter your usename and password into the login form.
Type name for your network place, then click Next.
Select the Open this network place when I click Finish option, then click Finish.
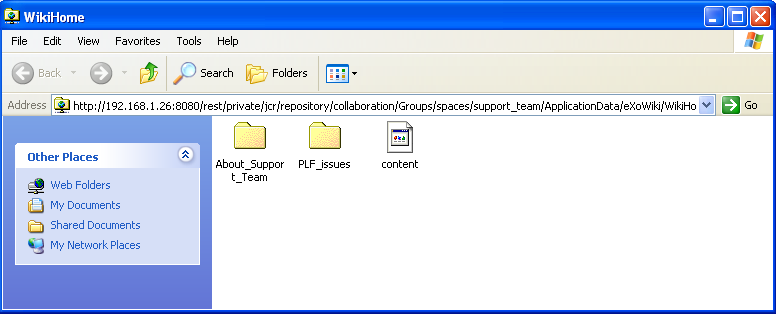
Enter your usename and password again to access your selected folder. You will be redirected to the selected folder as below:
"net use" command
In addition, for Windows, you can use the "net use" command to connect a drive in your computer with the shared resource of eXo Platform. The command format will be: net use X: http://mycompany.com:port/rest/private/jcr/{RepositoryName}/{WorkspaceName}/{Path} where X: is the drive letter you want to assign to the shared resource.
Open the cmd screen.
Type the "net use" command, for example: net use E: http://mycompany.com:port/rest/private/jcr/repository/collaboration/Groups/spaces/support_team/ApplicationData/eXoWiki/WikiHome, then hit Enter.
Enter username and password as requested in the screen. If your connection is successful, you will get a message like: "The command completed successfully". If not successful, check if you have followed steps in WebDAV Restrictions.
Open the Computer window, then select the E: drive. Here you will see the Wiki content of the Support Team space.
Note
If you still do not connect successfully, check if you have followed instructions in WebDAV restrictions.