Warning
You are looking at documentation for an older release. Not what you want? See the current release documentation.
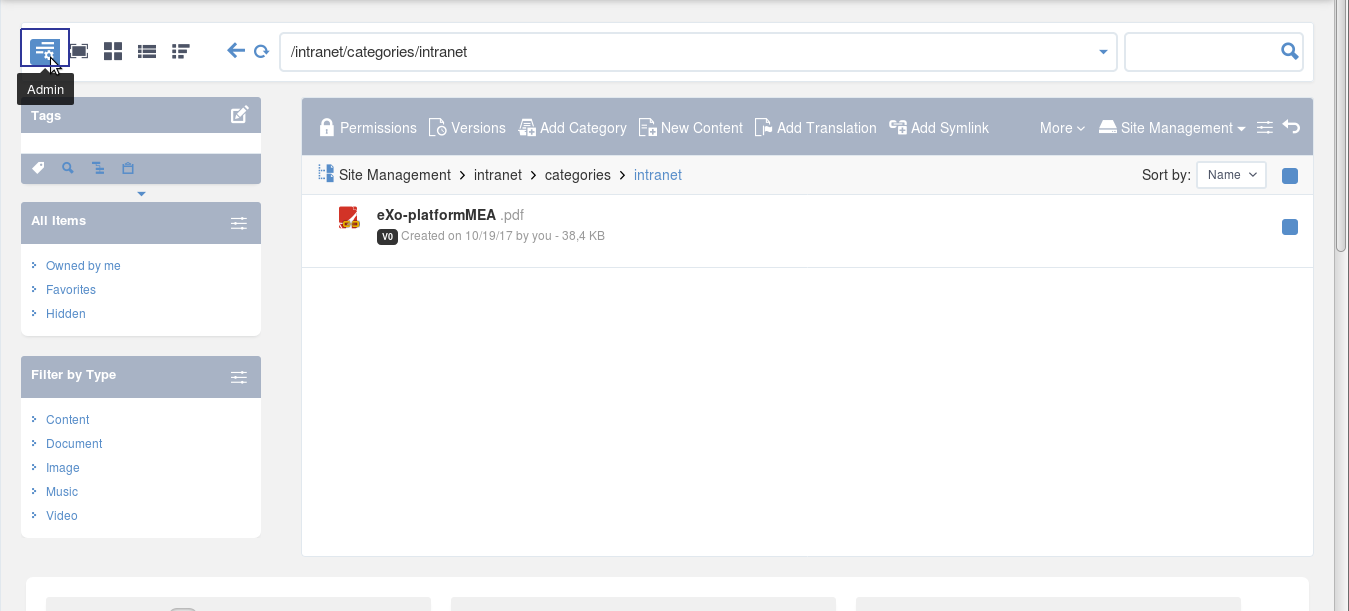
All eXo Platform views are in the Views tab. Here, you can view, edit, delete, and add new views.
Admin
Icons
List

Categories

Web

To learn about differences between these views, see the following table:
| View names | Default actions | Default templates | Default permissions |
|---|---|---|---|
| Admin |
Add Folder, Edit Document, View Permissions, Manage Actions, Manage Auditing, Manage Relations, Show JCR Structure, Upload, View Metadata, View Properties | List | *:/platform/administrators |
| Icons |
Add Folder, Edit Document, Manage Versions, Tag Document, Upload, View Metadata, View Permissions, Vote, Comment, Watch Document, Overload Thumbnail | Thumbnails |
*:/platform/users
|
| List |
Add Folder, Edit Document, Manage Versions, View Permissions, Tag Document, Upload, View Metadata, Vote, Comment, Watch Document | List |
*:/platform/users
|
| Categories |
Add Category, Add Document, Edit Document, View Permissions, Manage Categories, Manage Publication, Approve Content, Publish, Request Approval, Upload, Tag Document, Vote, Comment, Watch Document |
Content |
*:/platform/web-contributors
|
| Web | Add Category, Add Document, Add Folder, Edit Document, Manage Categories, Manage Publication, Approve Content, Publish, Request Approval, Upload, View Permissions Tag Document, Vote, Comment, Watch Document, Add Translation | Content |
*:/platform/web-contributors
|
Warning
You are looking at documentation for an older release. Not what you want? See the current release documentation.
Simply click ![]() corresponding to your desired view in the Action column.
corresponding to your desired view in the Action column.
The View form will open.

Click
 in the Action column.
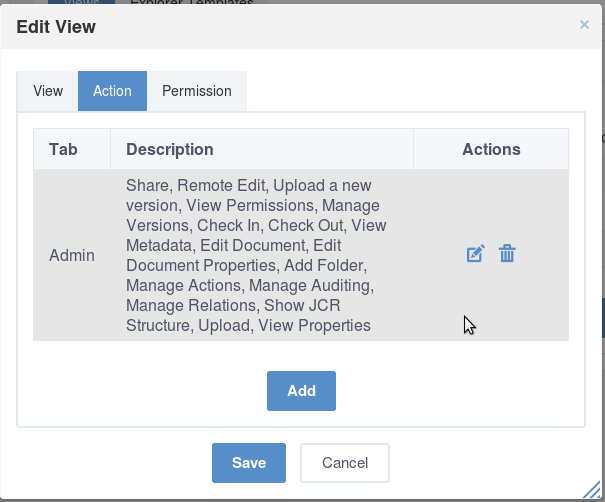
The Edit View form appears.
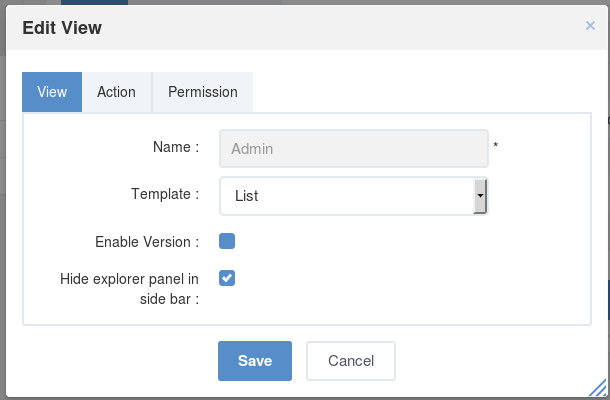
Edit the view properties.
You cannot change the view name.
If you select the Enable Version checkbox, this view automatically increases to one version after you have clicked . It is displayed at the Base Version column in the Views tab. Moreover, the View tab in the Edit View form will have the Restore Version field which allows rolling back a given version.

By default, the Hide explorer panel in side bar checkbox is only selected for the Admin and List views. This means you can use the Explorer tree to browse content from the side bar in the Icons, Categories, and Web views by default. However, in the Admin and List views, you need to deselect these checkboxes first.
Optionally, select the Action tab to do the following actions on the tab.
i. Click
to edit one existing tab. You can add or remove functions on the selected tab by selecting/deselecting the corresponding checkboxes.
Note that you cannot change the tab name.ii. Click
 to delete an existing tab.
iii. Click to add a new tab to the view.
Optionally, select the Permission tab to delete the existing permissions or to add new permissions.
Note
Setting the * membership for a group will allow all users of the group to use this view when exploring documents.
Click to apply all changes in the View tab.
Adding/deleting an action in a view
In the previous part Views in eXo Platform, we described different views in eXo Platform with their defaut actions.
It is possible to edit the action bar of a view by following these steps:
Log in to eXo Platform as an administrator.
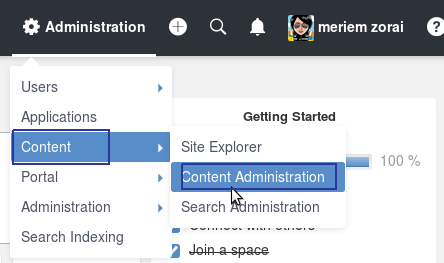
Go to → → .
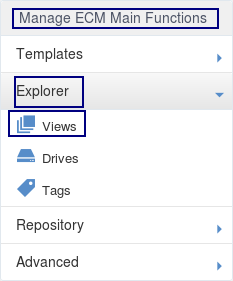
In Manage ECM Main Functions panel click on Explorer tab and the click on Views item.
In the right panel, click on edit button
 of the view you want to change, List view for example.
In the Edit form, select Action tab then click on
.
A new popup appears, you can check to add or uncheck to delete actions on the view.
Click to apply actions check/uncheck then in the Edit View form.
Click ![]() corresponding to the view you want to delete, then click OK in the confirmation message.
corresponding to the view you want to delete, then click OK in the confirmation message.
Note
You cannot delete a view which is in use.
Warning
You are looking at documentation for an older release. Not what you want? See the current release documentation.
Click located at the bottom to open the Add View form.

Specify the view name in the Name field that must be unique, and only contains standard alphanumeric characters. This field is required.
Select one template from the Template drop-down menu.
Note
Tick the Enable Version checkbox if you want to activate versioning for your view.
Select the Action tab, then click Add to create a functional tab on this view. This step is required.
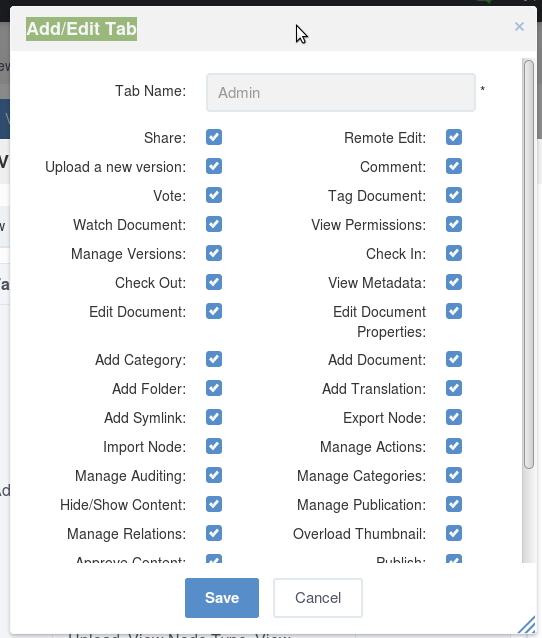
The Add/Edit Tab form appears.
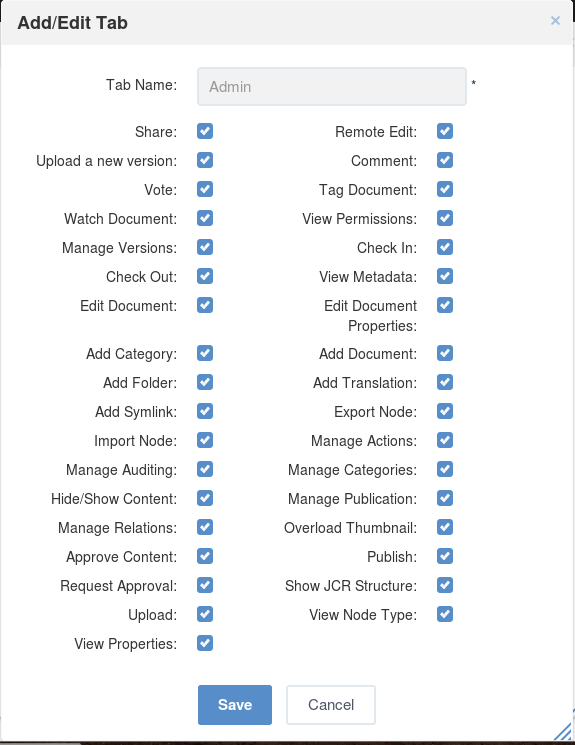
i. Enter the name for the tab in the Tab Name field.
ii. Tick checkboxes corresponding to the actions you want to add to the tab.
iii. Click to finish creating a tab.
The newly created tab is displayed in the Tab column.

Select the Permission tab, then click to add permissions for the view. It is required.
Click to finish adding your view.