This section includes the following topics:
The Netvibes widget uses Universal Widget API (UWA) - a powerful framework for Web widgets development - for both Netvibes widgets and many various environments.
The UWA widget consists of combinations from XHTML/XML, JavaScript/Ajax, CSS code with the MIME type application/x-uwa-widget. In eXo IDE, you can create the Netvibes widget, preview it and deploy to the Netvibes Ecosystem.
Note
If you want to get acquainted with writing your own widgets, refer to this page.
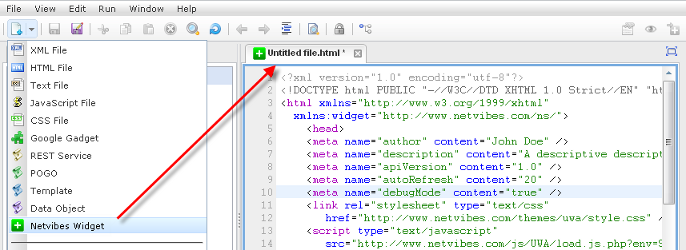
Click
 on the toolbar and then select
Netvibes Widget
from the drop-down menu;
on the toolbar and then select
Netvibes Widget
from the drop-down menu;
Or, go to → from the top menu;
Or, right-click the folder to which you want to add a Netvibes widget file, then click → from the top menu.
The new Netvibes widget file is opened in the editor, enabling you to edit and save it.
Open your desired widget file in the Content panel.
Click
 on the toolbar;
Or, go to → from the top menu.
The selected widget is opened in the Preview tab.
Deploying Netvibes widget to Netvibes Ecosystem
Netvibes widgets are placed in the remote system called Netvibes Ecosystem. This is the location where such widgets can be found and compiled for other platforms.
There are a couple of ways to deploy a Netvibes widget. You can do it manually, or use the deployment mechanism. Manual deployment is easier because you do not need to get an API key from Netvibes.
Manual deployment
Get the URL of your Netvibes widget by selecting your widget, then clicking → .
Go to the Netvibes Ecosystem, then click Create or submit and Submit Widget.
Paste the URL of your gadget, and do not forget to remove the /private part from it. If you do not do this, Netvibes will not be able to access it.
Fill in the form and finish the process. The widget is now available in the ecosystem.
Note
For deployment using our wizard, you need to contact Netvibes at
<business@netvibes.com>
and ask for your API key.
Deploying UWA widget:
Get the URL of your netvibes widget. To do this, select your widget and click → from the menu. Copy the URL.
Click
 on the toolbar;
Or, go to → on the top menu to open the Deploy UWA widget to Ecosystem form:

Paste the URL of your gadget, and do not forget to remove the "/private" part from it, or netvibes will not be able to access it.
Enter the information about the widget in the fields in the Step 2 form. All fields marked with the asterisk (*) are required.
Click Next after completing your details.

Enter your Netvibes credentials and the API key/secret that Netvibes gave you by email. All these fields are mandatory.

Details:
Field Description Login Your login at Netvibes Ecosystem. Password Your password at Netvibes Ecosystem. Api Key The string generated by Netvibes and used for identifying you. Secret Key The string generated by Netvibes and used for submitting your actions. Tip
Click the Back button to return to the previous step to edit your entered information.
Click
to start deploying the widget to the Netvibes Ecosystem.
The result is displayed in the Output panel. If the deployment is successful, you will receive the message below:
        [INFO]*[http://78.137.4.16:53081/rest/ide-vfs-webdav/repository/dev-monit/TestWidget.html] deployed
        successfully.
If unsuccessful, you will receive the error message which varies, depending on each case.
[ERROR] Error: The link already exists.
Note
The deployed widget can be found at the Ecosystem page on the My creation tab.
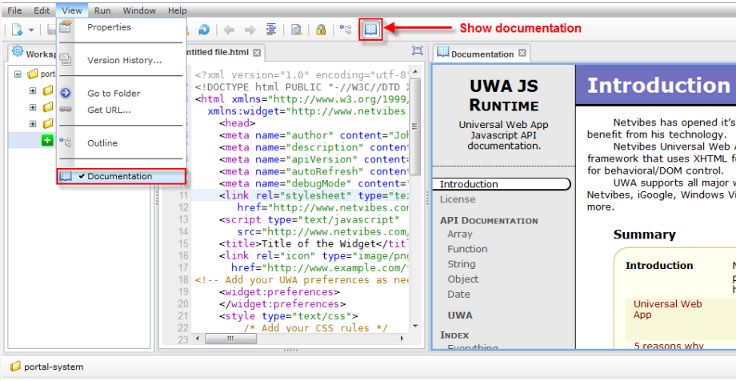
Viewing Netvibes documentation
There is a convenient way to view the developer's documentation, while creating your widget in eXo IDE. When
opening a Netvibes widget in editor, click
![]() on the toolbar or go to
→ .
on the toolbar or go to
→ .
The top menu item and a panel with loaded documentation will be opened at the right part of the application.
See also