As a web-contributors, you can easily work with categories in Sites Explorer via the and actions added to the Action bar.
By default, these buttons are available in the Categories and Web views. To know which drives have these views, see here for more details.
This function enables you to quickly create a new category in Sites Explorer.
Select a folder in which you want to create a new category.
Select
![[ Add category ]](images/ecms/add_category_button.png) on the Action bar to open the Add Category form.
on the Action bar to open the Add Category form.

Enter a name for the category in the Category Name field.
Click to accept creating the new category.
Assigning a category to content
You can assign available categories to content/document folders only.
Select a content/document folder to which you want to assign a category.
Click
![[ Manage Categories ]](images/ecms/categories_button.png) on the
Action
bar.
on the
Action
bar.
The Add Category form appears.
Select the Select Category tab to show the available categories.
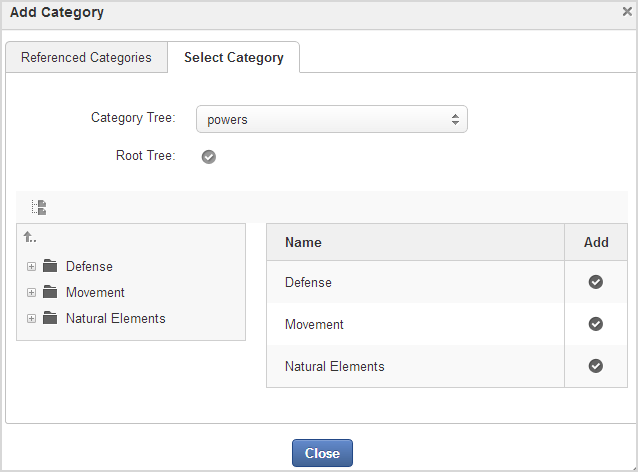
Select a category tree for the content/folder.
Click
 next to Root Tree to add the category tree to the content/folder.
Or/And click a category on the left, then click
corresponding to the child category on the right to add it to the content/folder.
The categories added to the content/folder will be listed in the Referenced Categories tab.

Note
You can add many categories to content.
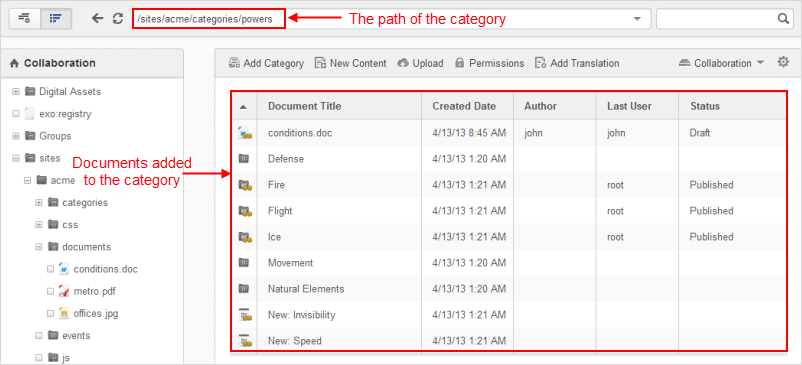
All nodes, which belong to a category, can be viewed as follows:
Viewing a category allows you know which content is added to the category and you can view it by double-clicking its name or do many different actions in the right-click menu.
Go to the drive which contains the category you have added. There will be a list of categories available.
Select your desired category. The content added to that category will be listed.
Note
To know which drives contain categories, see Categories in Content Administration.
When copying and pasting content in the category tree, a reference to the original content will be created. This reference is a symlink rather than a copy. This feature is used to preserve the disk space.
Removing a category from content
Select content to which categories have been added.
Click
on the Action bar.
Select the Referenced Categories tab.
Click
 that corresponds to the category you want to delete.