This search enables you to search with more constraints to limit the returned results.
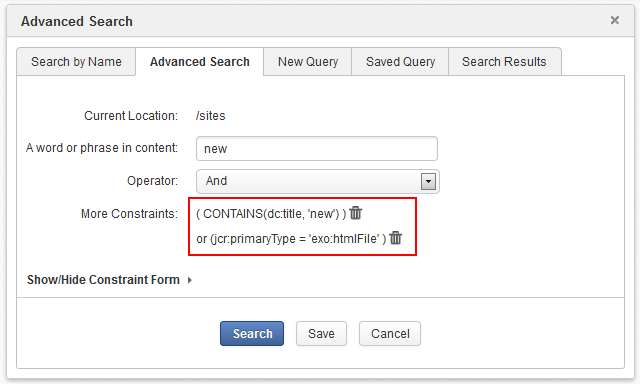
Extra search constraints are entered in the Advanced Search tab of the Advanced Search form.

The Current location field is not editable. It shows the path selected to search.
Enter search terms in the A word or phrase in content field.
Select the Operator.
Select And operator to only return results that meet both the search terms and the entered constraints (see Step 3).
Select Or operator to return results that meet either the search terms or the entered constraints (see Step 3).
Click Show/Hide Constraint Form to add more constraints.
A further constraint options window will appear.

In which:
Item Description 
Adds more than one constraint with either of two operators (And and Or). 
Adds a constraint to search by a property with specific values. 
Adds a constraint to search by a property that contains one of the word in the keyword. 
Adds a constraint to search by a property that does not contain the keyword. 
Adds a constraint to search by a duration of date (created, modified). 
Adds a constraint to search by a document type, including File, Article, Podcast, Sample node, File Plan, Kofax. 
Adds a constraint to search by categories. 
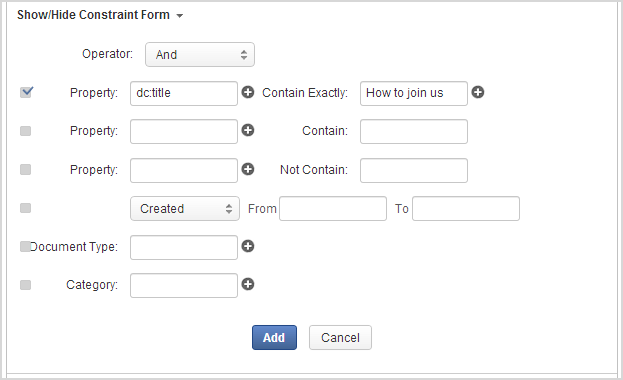
Adds a value/property. Select the constraint operator (And/Or).
Add the required constraints using one of the following methods:
Click Add to add any/all activated constraints.
The constraints will be converted to an SQL query and displayed in the search form.
Remove unnecessary constraints by clicking

Click Search to launch the search. Results will be displayed in the Search Results tab.
Click Save and put a name for this search configuration if you want to save it to use in future.
The followings are methods to add the required constraints.
Adding a constraint for exact values
Tick the checkbox that corresponds to the constraint you want.
Enter the property you want to locate, or click
A list of possible properties appears.
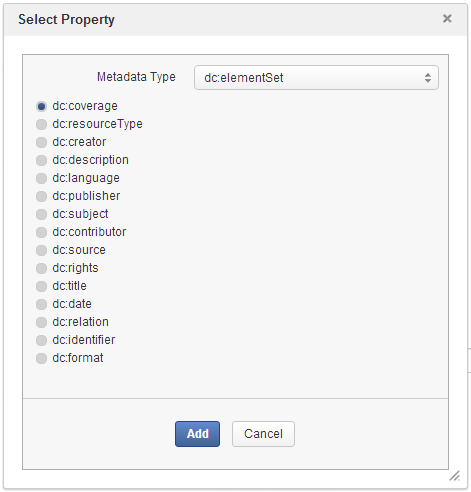
Select a property from the list and click . The selected property will populate the Property field.
Define the property value to search for by entering a value into the Contain Exactly field, or click
.
The Filter Form with all pre-existing values for your selected property will appear.
If the value you require is in the list, select it and click Select.
If the value you require is not in the list, enter it in the Filter field and click
. The value will populate the
Contain Exactly
field of the constraints form.
Adding a constraint including or excluding values
Tick the checkbox corresponding to the Contain or Not Contain constraint, as appropriate.
Enter the required property in the Property field, or click
(refer to
Step 2
in the
Adding a constraint for exact values
section for more information).
Enter the required values in the Contain or Not Contain fields.
Tick the checkbox beside the field with the drop-down menu (below the Property entries).
Define the search condition from the drop-down list (Created/Modified).
Click the From field.
A small calendar will appear.
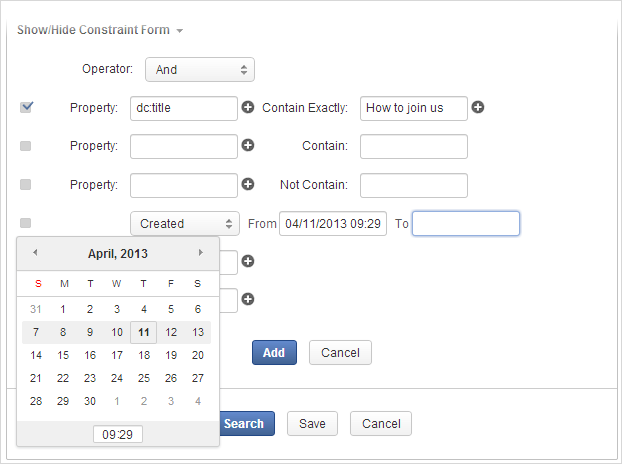
Select the date you want to use as a constraint.
Repeat the above steps for the To field.
The selected dates will populate the From and To fields in the Add constraint form.
Adding a constraint by document type
Tick the checkbox beside the Document Type field.
Enter the document type you want to search, or click
to open a list of document types.

Tick the checkbox corresponding to your desired document type, then click Save.
The selected document type will populate the Document Type field.
Adding a constraint by category
Tick the checkbox beside the Category field.
Enter the category you want to search, or click
for a list of categories.
Click
 that corresponds to your desired category.
The selected category will populate the Category field.