Import and export are new functionalities added in WSRP 2. Exporting a portlet allows a consumer to get an opaque representation of the portlet which can then be use by the corresponding import operation to reconstitute it. It is mostly used in migration scenarios during batch operations. Since GateIn does not currently support automated migration of portal data, the functionality that we provide as part of WSRP 2 is necessarily less complete than it could be with full portal support.
The import/export implementation in GateIn 3.5 allows users to export portlets from a given consumer. These portlets can then be used to replace existing content on pages. This is accomplished by assiging previously exported portlets to replace the content displayed by windows on the portal's pages. Let us walk through an example to make things clearer.
Clicking the "Export" action for a given consumer will display the list of portlets currently made available by this specific consumer. An example of such a list is shown below:

Once portlets have been selected, they can be exported by clicking the "Export" button thus making them available for later import:

You can re-import the portlets directly by pressing the "Use for import" button or, on the Consumers list page, using the "Import" action for a given consumer. Let's assume that you used that second option and that you currently have several available sets of previously exported portlets to import from. After clicking the action link, you should see a screen similar to the one below:

As you can see this screen presents the list of available exports with available operations for each.
View: displays the export details as previously seen when the export was first performed
Delete: deletes the selected export, asking you for confirmation first
Use for import: selects the export to import portlets from
Once you have selected an export to import from, you will see a screen similar to the one below:

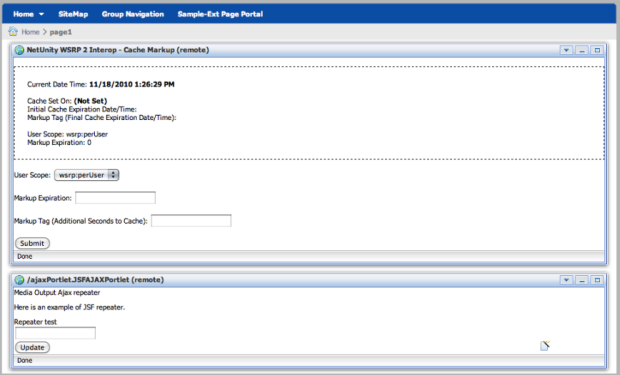
The screen displays the list of available exported portlets for the previously selected export. You can select which portlet you want to import by checking the checkbox next to its name. Next, you need to select the content of which window the imported portlet will replace. This process is done in three steps. Let's assume in this example that you have the following page called page1 and containing two windows called NetUnity WSRP 2 Interop - Cache Markup (remote) and /samples-remotecontroller-portlet.RemoteControl (remote) as shown below:

In this example, we want to replace the content of the /samples-remotecontroller-portlet.RemoteControl (remote) by the content of the /ajaxPortlet.JSFAJAXPortlet portlet that we previously exported. To do so, we will check the checkbox next to the /ajaxPortlet.JSFAJAXPortlet portlet name to indicate that we want to import its data and then select the page1 in the list of available pages. The screen will then refresh to display the list of available windows on that page, similar to the one seen below:
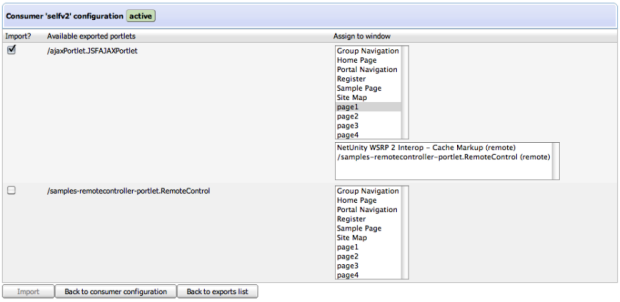
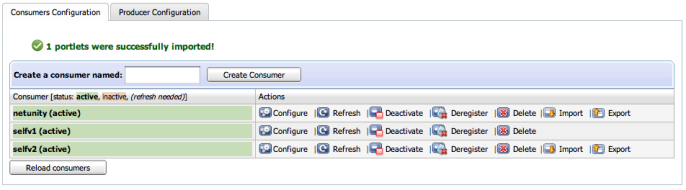
Note that, at this point, we still need to select the window which content we want to replace before being able to complete the import operation. Let's select the /samples-remotecontroller-portlet.RemoteControl (remote) window, at which point the "Import" button will become enabled, indicating that we now have all the necessary data to perform the import. If all goes well, pressing that button should result in a screen similar to the one below:
If you now take a look at the page1 page, you should now see that the content /samples-remotecontroller-portlet.RemoteControl (remote) window has been replaced by the content of the /ajaxPortlet.JSFAJAXPortlet imported portlet and the window renamed appropriately: