Warning
You are looking at documentation for an older release. Not what you want? See the current release documentation.
The formatting toolbar (or the microblog component) is present at every place where you can add text message. It allows you to:
format your text: bold, italic, numbered list, bullet list
quote a previous message.
insert a link in your status message/comment
insert an image in your status message/comment.
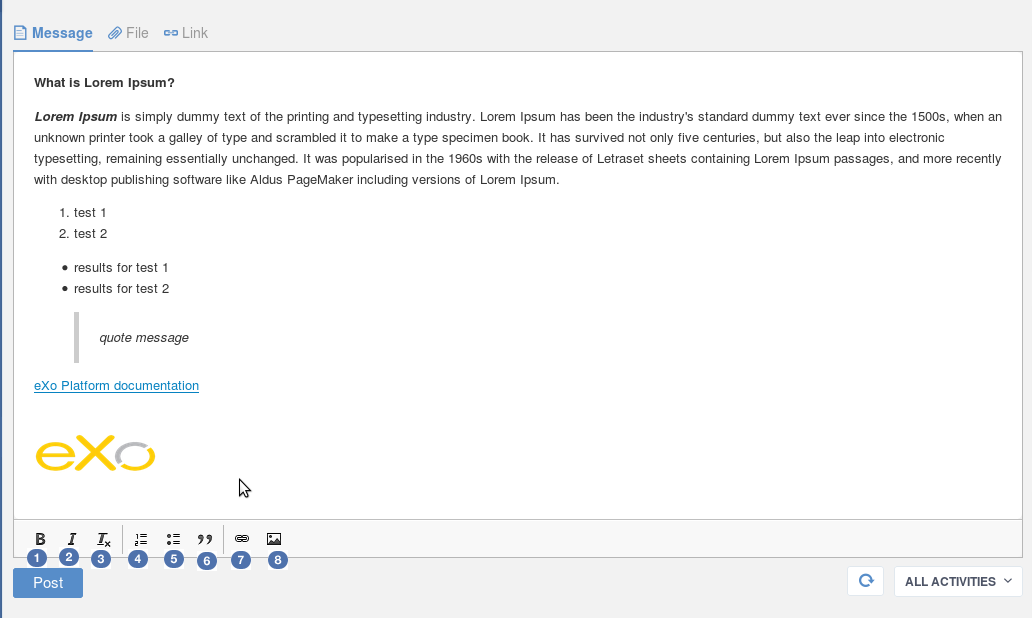
Text formatting in the microblog
You can format your text to make it richer and more readable by using different effects.
Select the text you want to format. Then click on one of the buttons from the formatting toolbar to apply its effect:
 The first button formats the text as bold.
 The second button formats the text as italic.
 The third button clears the existing format.
 Writing a text then clicking on the fourth button adds the text to a numbered list. Clicking on button
of the keyboard adds a new line with the following number.
Writing a text then clicking on the fourth button adds the text to a numbered list. Clicking on button
of the keyboard adds a new line with the following number. When the listing is finished, to exit from the numbered list, you should click twice on button of the keyboard.
 Typing a text then clicking on that button adds a bullet list. When you finish your listing, you need to double click on
button of the keyboard.
Typing a text then clicking on that button adds a bullet list. When you finish your listing, you need to double click on
button of the keyboard.
The formatting toolbar allows you to quote a previous text message. To do this, click on the Quote button  and then copy and paste the text you want to quote.
Double click on the button on your keyboard to leave the quote area.

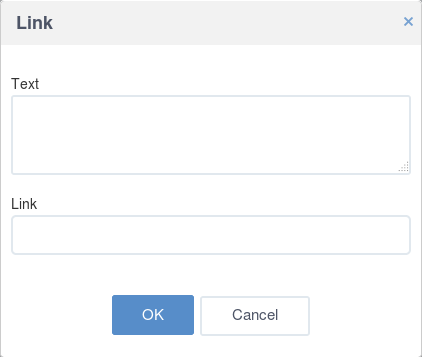
To insert a link in your text message/comment, click on the link button  to bring up a Link form . Type the text and link into this form.
The text you type will appear in your message/comment and will redirect users to the inserted link.
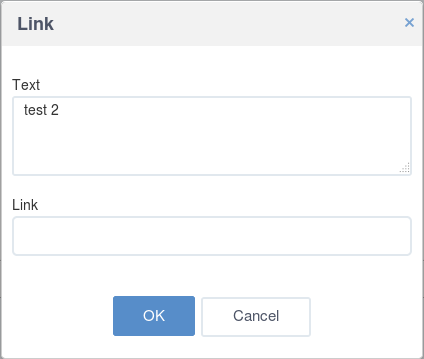
You can also link to text that has already been typed. Select the text, then click on the Link button .
The Link form will appear with the Text field already completed. To finish, type the link.
Note
It is also possible to add a link by right-clicking in the text area then selecting Link.

The last button of the formatting toolbar in the microblog is the Insert Image button allowing you to insert an image in your message/comment.
To insert an image in your text message/comment, follow these steps:
Click on the Insert Image button
 to open the Select image form.
You have four options:
Drop an image: drag and drop an image from your computer. A progress bar will appear to indicate the upload progress.
When the upload has ended, the image will appear in the dedicated area.
Upload an image from your desktop: It allows you to select an image from your computer. Browse for the image and double-click on it to select. A progress bar will appear to indicate the upload progress.
When the upload has ended, the image will appear in the dedicated area.
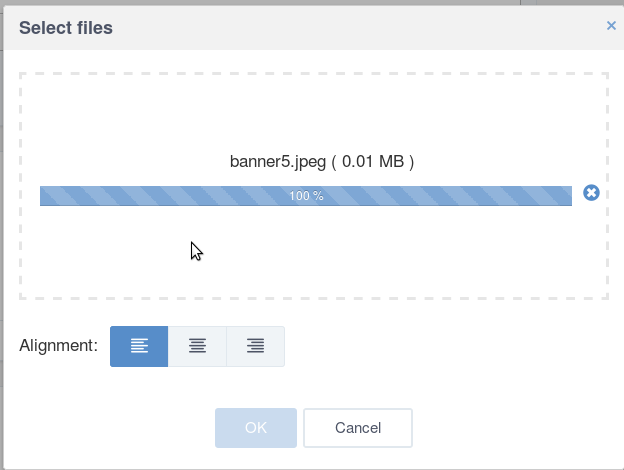
Select on server: select an image already on the server from your drives. Clicking on the link opens the Select files form.
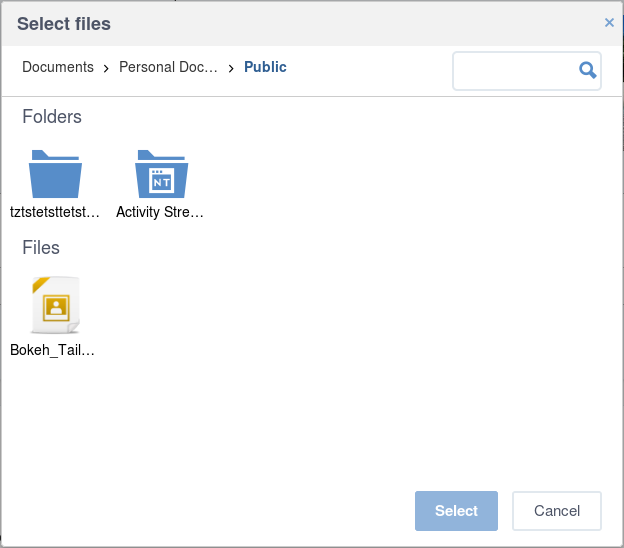
Navigate through your drives and then select an image. This will be directly displayed in the dedicated area.
Pick an image online: insert an image using its URL. Paste the image link into the Image URL field. An upload time will appear and the button will be greyed.

When the upload has ended, the image will appear in the dedicated area and the button will become clickable.
Note
Click on the button to return to the screen showing the options.
When picking an image online, click on the Back button. This button will disappear when the image is fully uploaded.
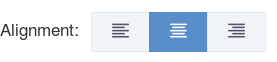
To choose the alignement you want, click on one of the three buttons.
Click on the button. The image will appear in the comment/message area.
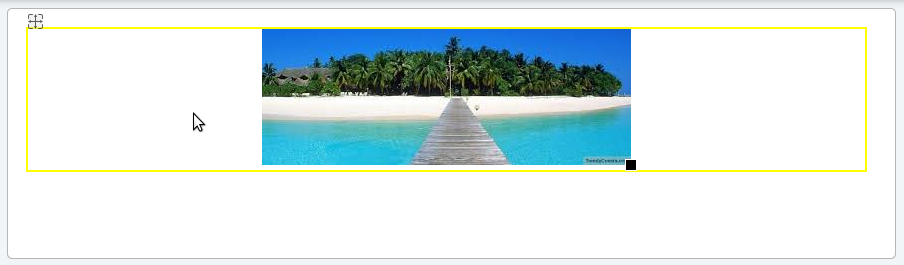
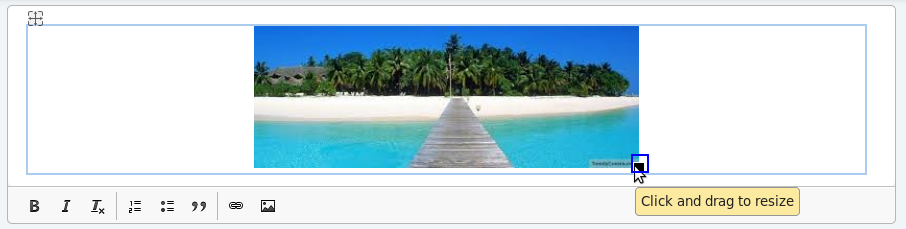
To resize, hover over the image to bring up a black frame. Manipulate the frame to the size you want.
When you right click on the image, a contextual menu appears:

Click on Copy followed by Paste to duplicate the image in the editor.
lick on Cut followed by Paste to move the image to another location in the editor.
Click on Change Image to open the Insert Image form prefilled with:
the image preview.
the image alignment as previously selected.
the Remove Image link allowing you to remove the image and start again.
Click on Link to open the Link form allowing you to insert an image using its URL.
Tip
After you’ve finished resizing the image and posted it in the activity stream, the image will appear with the exact size you defined. Otherwise it appears in its default size.