Warning
You are looking at documentation for an older release. Not what you want? See the current release documentation.
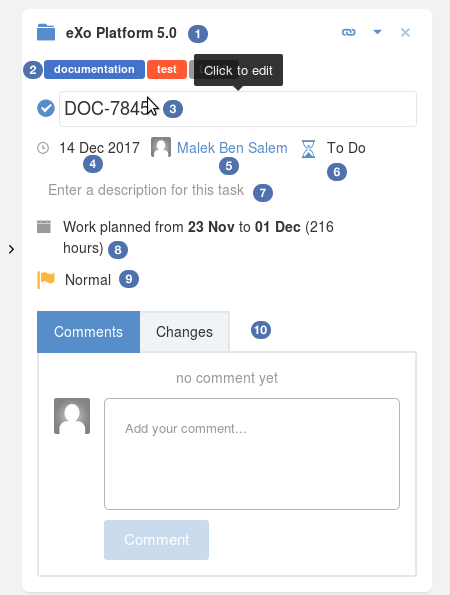
After creating a task, the right pane will be opened for you to edit the task directly (if you create the new task via the overview interface) or you can choose any other task from the central pane. The details of a task are as follows:

In which:
 : the name of the project that the task belongs to. In case the task is not assigned to any project, this field says "No Project".
Note
To select a project for a task, you must have permission on that project. Besides, a task should belong to only one project, so you should remove the existing project from the task before adding a new one.
If you move a task to another project, its status will be set to the same one in the new project workflow (statuses must match alphabetically to be considered the same). If no status matches in the new project workflow, the status is set to the first one in the new project workflow.
 : the labels that are assigned to the task.
 : the title of the task which should be from 1 to 250 characters.
 : the due date of the task. You can choose among 4 options, including None, Today, Tomorrow and Next Week or specify any other due date.
 : the assignee and co-workers that are assigned to the task. Only one assignee is accepted, while you can add multiple co-workers.
 : the status of the task in the project workflow. Note that this information is available only for the tasks that are assigned to a specific project.
 : the task description.
 : the schedule of the task. If no schedule is specified, this field says "Unscheduled". To remove the current schedule, hover cursor over it and select the deletion icon that appears.
 : the task priority. You can choose between 4 values, including High, Normal, Low and None.
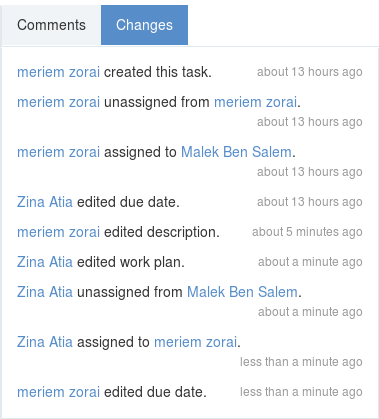
 : the Comments tab allows people to discuss about the task, while the Changes tab shows all changes history of the task.

 : the Mark as completed feature, clicking this icon will mark the task as completed and it will disappear from the List and Board views unless Filter is set to show completed tasks.
Note
A formatting toolbar appears once you click in the comment composer. It allows you to change the formatting of your message, attaching images and links and preview how it will look once posted. (like what we have for the activity stream composer)
To edit the task:
Hover cursor over any information and click it that you want to edit.
Make changes on the task, then hit Enter key or just click out the edited field.