Click at the bottom to open the Add Drive form.
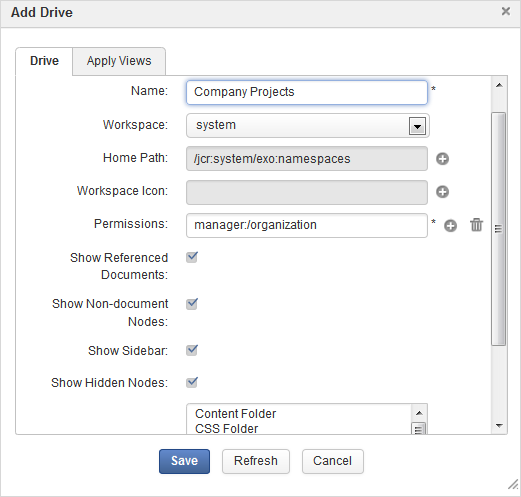
Input a name for the new drive in the Name field that is required.
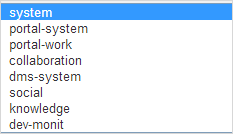
Select a workspace for the drive from the drop-down menu by clicking the Workspace entry.
Select the home path for the drive by clicking
 .
.Browse an icon for the workspace by clicking
.
Select permissions for groups that have access rights to this drive by clicking
.
Select or deselect the various checkboxes to hide or show the drive elements respectively.
- Show Referenced Document
Allows viewing referenced documents.
- Show Non-document Nodes
Allows viewing non-documents.
- Show Sidebar
Allows showing the sidebar.
- Show Hidden Nodes
Allows showing the hidden nodes.
Select the document type that will be created in this drive.
Limit the node types shown in the left tree by clicking
next to the Allowance nodetype on left tree field.
If you do not select the value for this field, this means all node types are shown in the left tree. The "empty" value is converted into * once you have clicked .
If you define specific node types in this field, only these node types are shown in the left tree.
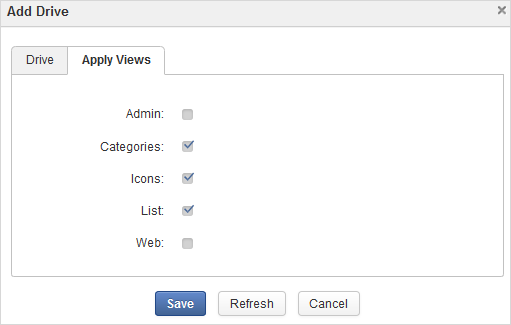
Select the Apply Views tab and select the view types you want to be available in the drive.
Click to complete creating the new drive, or to clear the form.