Open the Quick Add Task form via the following ways:
The first way
Select
 on the Calendar toolbar.
The second way
Right-click the Calendar View pane, then select Add New Task from the drop-down menu.

The third way
i. Hover your cursor over the calendar which you want add tasks, then click
 that appears.
ii. Click Add Task from the drop-down menu.
The Quick Add Task form will display.
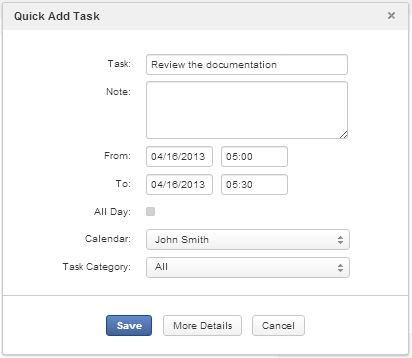
Details:
Field Description Task The name of the task. Note The note of the task. From The starting date/time of the task. To The ending date/time of the task. All Day Ticks the checkbox to set the task duration to be all day. If you do not check this option, you have to select the starting date/time and ending date/time. By default, the starting and ending dates are the current ones. Calendar The calendar which includes the task. Task Category The category which includes the task. Fill in fields of the Quick Add Task form.
When you right-click to create a task, the start date and time are where the click occurs and the default duration is 30 minutues. But, when you click
on the top left corner of Calendar toolbar or Add Task by selecting
,
the start date is current one with duration of 30 minutes.When you select a start date/time, an end date/time will be suggested. You can select another values to your desires.
Click to finish creating your new task; or click
 to add more details.
Open the Quick Add Task form by following steps as stated in Quick adding a task.
Click
in the Quick Add Task form to open the Add/Edit Tasks form.
Give details of your task in the fields of tabs.
i. In the Details tab, you can:
Follow the Step 2 to provide basic information for your task.
Also,
Select the user to whom you want to delegate the task in the Task Delegations field. To do this, simply enter their names manually, or click
 to select users from the Select Users form.
Select the priority level of the task from the Priority drop-down menu.
Select the category of the task from the Task Category drop-down menu. You can add a new category by clicking
.Select the status of the task from the Task Status drop-down menu: Needs Action, In Process, Completed or Canceled.
Click
 to attach any files, such as map, or invitation card, with your task.
You can attach a maximum of 10 files to a task.
ii. In the Reminders tab, you can create one notification to remind you of your task. A reminder includes the summary information of the task, such as title, time, and place where the task will happen. To create a reminder for a task, see Creating a reminder for upcoming events for more details.