9.1.1.1.4. Managing preferences

Preferences enable you to edit content in the single content viewer (SCV) and the content list viewer (CLV), reset the display of the content in SCV and CLV and publish content.

Editing the single content viewer

  1. Turn on the Edit mode.

  2. Hover your cursor over a single content viewer and select of a single content viewer.

    The Content Detail Preferences dialog appears.
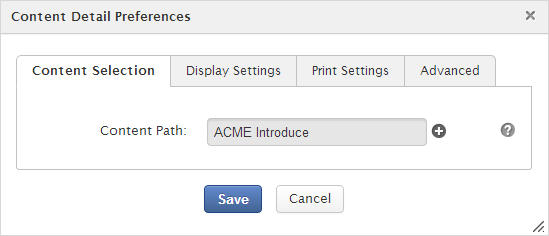
    Details:

    Field Description
    The Content Selection tab Content Path: Select the path of the content that you want to show.
    The Display Settings tab Configure the visibility of Title, Date and Option Bar.
    • Show Title: Select this checkbox to display the title of the content.

    • Show Date: Select this checkbox to display the date of the content publication.

    • Show Option Bar: Select this checkbox to display the Option bar which is used to show the print link.

    The Print Settings tab
    • Show in Page: The content is shown in the page.

    • with: Parameters contain the content path.

    The Advanced tab This tab consists of two parts:
    • Dynamic Navigation: Allow you to get a parameter to configure the portlet by URL. It means that the URL containing the content path can be dynamically changed.

      • Disable: The single content will be opened by an URL containing the Content Path.

      • Enable: This portlet is configured with the provided parameter ("content-id" by default) and the content.

    • Content Visibility: Allow you to use a cache shared between users to get content. If you want to get content, which are displayed in CLV or SCV, from one cache, select Restricted by Authentication. If not, select Restricted by User Roles. In most cases, you should not switch to Restricted by User Roles as it reduces the overall performance.

    Note

    Hover your cursor over question mark to see a quick help for each section.

  3. Click next to the Content Path to select another content. The Select Content dialog appears.

  4. Select a folder in the left pane, and its content in the right pane. The selected content will be displayed in the Content Path field.

  5. Tick the checkboxes, including Show Title, Show Date and Show Option Bar, if you want to display the content title, the publication date and the print button like the illustration below.

    i. In the Print Setting part, click magnifying glass to open the UIPageSelector dialog.

    ii. Click magnifying glass, then click a folder on the left and select a page which will show the content on the right by clicking .

  6. Click Save to save all your changes.

Editing the content list viewer

  1. Turn on the Edit Mode, then hover your cursor over a content list viewer and select .

    The Content List Preferences dialog appears.

    Details:

    Field Description
    The Content Selection tab

    Mode: This mode is to select web content for the list viewer. There are two modes:

    • By Folder: Allows selecting a content folder in the Folder Path field.

    • By Content: Allows selecting by the content in a specific folder in Folder Path field.

    Folder Path: The path to a location of a folder that contains the content.

    Order by: Sorts content in the List Viewer by Title, Created Date, Modified Date, Published Date, Event Date, or Index in the ascending or descending order.

    The Display Settings tab

    Header: The title of all content that is shown on the top of the content list viewer.

    • Automatic Detection: Ticks this checkbox to enable automatically detecting the header of the content list viewer basing on the current selection.

    Template: The template which is used to view the content list.

    Paginator: The template which is used to view each content in the list.

    Items per Page: The number of items which will be displayed per page.

    The following options which can be shown or hidden by ticking or unticking checkboxes respectively.

    • Show Title: Title of each published web content/document.

    • Show Header: Header of each published web content/document.

    • Show Refresh: The Refresh button at the left bottom of the page.

    • Show Image: The illustration of each published web content/document.

    • Show Date: The created date of each published web content/document.

    • Show More Links: The Read more link to read all the content of web content and/or document.

    • Show Summary: The summary of each web content/document.

    • Show Link: The link of web content/document.

    • Show RSS Link: The RSS link of all content of web content/document.

    The Advanced tab

    Dynamic Navigation

    • Disable: The single content will be opened by an URL containing the Content Path.

    • Enable: This portlet is configured with the provided parameter (content-id by default).

    • By: This parameter is the key in the URL to let CLV know which really is the path in the current URL.

    • Show in Page: The single content in CLV will be shown in a selected page. You can select any page but should take one with a Content Detail Portlet. The "Dynamic Navigation" is enabled in the Content Detail Portlet that interprets the URL and shows a single content.

    • With: This parameter is the key in the URL to let SCV know which really is the path in the current URL.

    Content Visibility: Allows using a cache shared between users to get content. If you want to get content which is displayed in CLV or SCV from one cache, select Restricted by Authentication (default). If not, select Restricted by User Roles. In most cases, you should not switch to Restricted by User Roles as it reduces the overall performance.

  2. Select the Content Selection tab:

    • Select content you want to show on the content list viewer by clicking next to the Folder Path field.

      • If you select the By Folder mode, select an available site on the left, then select a folder that contains content (documents and/or web content) on the right by clicking the folder.

      • If you select the By Content mode, select an available folder from the left pane, all content in this folder will be listed in the right pane. Click content on the right that you want to add to the content list. There will be a message, informing that you have successfully added it to the Content List. The selected content will be listed in the Content List.

    • Click the Order by field and select one criterion to sort the content list in the ascending or descending order.

  3. Select the Display settings tab:

    • Enter a header for the content list in the Header field if you want.

    • Select a template to display the content list in the template list.

    • Tick/Untick your desired options.

  4. Select the Advanced tab to activate the dynamic navigation and select the content visibility.

  5. Click Save to accept your changes.

Copyright ©. All rights reserved. eXo Platform SAS
blog comments powered byDisqus