In the previous section you configure a reverse proxy in front of eXo Platform, and it is the proxy which encrypts the requests and responses. Alternatively you can configure eXo Platform to allow https access directly, so no proxy between browsers and eXo Platform. See the following diagram.
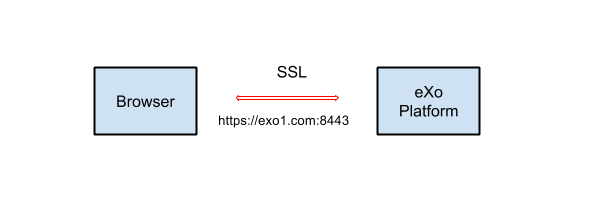
Your server, exo1.com in the diagram, needs a server key to identify itself in the SSL handshake. If you do not have the server key, you can generate one using Java keytool (if you are using Windows, replace parentheses with quotation marks):
keytool -genkey -keyalg RSA -keysize 2048 -keystore serverkey.jks -alias exo1.com -storepass 123456 -keypass 123456 -dname 'O=MYORG,OU=MYUNIT,L=MYCITY,ST=MYSTATE,C=MY,CN=exo1.com'
Note
As of Java 7, you can use the option -ext san=ip:<IP_ADDRESS> to specify an IP address that is acceptable in your certificate.
Now you have the keystore file serverkey.jks with the password 123456 that you will use
to configure eXo Platform Tomcat/JBoss later.
Importing your SSL certificate into Java truststore
You need to add the certificate into Java truststore. It is necessary to make gadgets work.
Export your certificate from your server key:
keytool -export -keystore serverkey.jks -alias exo1.com -file exo1.crt
Import the certificate into Java truststore:
keytool -import -keystore $JAVA_HOME/jre/lib/security/cacerts -file exo1.crt -alias exo1.com
Configuring Platform JBoss
Edit the $PLATFORM_JBOSS_HOME/standalone/configuration/standalone-exo.xml file by adding
"https connector" to the web subsystem configuration
(change values of certificate-key-file and password to your value):
<subsystem xmlns="urn:jboss:domain:web:1.5" default-virtual-server="default-host" native="false">

    ...

    <connector name="https" protocol="HTTP/1.1" socket-binding="https" scheme="https" secure="true">

        <ssl name="https" key-alias="exo1.com" password="123456" certificate-key-file="/path/to/file/serverkey.jks"/>

    </connector>

    ...

</subsystem>
After starting eXo Platform, you can connect to https://exo1.com:8443/portal. If you are testing with dummy server names, make sure you created the host exo1.com.
Configuring Platform Tomcat
Edit the
$PLATFORM_TOMCAT_HOME/conf/server.xmlfile by commenting the following lines:<Connector address="0.0.0.0" port="8080" protocol="org.apache.coyote.http11.Http11NioProtocol"
enableLookups="false" redirectPort="8443"
connectionTimeout="20000" disableUploadTimeout="true"
URIEncoding="UTF-8"
compression="off" compressionMinSize="2048"
noCompressionUserAgents=".*MSIE 6.*" compressableMimeType="text/html,text/xml,text/plain,text/css,text/javascript" />
Uncomment the following lines and edit with your
keystoreFileandkeystorePassvalues:<Connector port="8443" protocol="org.apache.coyote.http11.Http11Protocol" SSLEnabled="true"
maxThreads="150" scheme="https" secure="true"
clientAuth="false" sslProtocol="TLS"
keystoreFile="/path/to/file/serverkey.jks"
keystorePass="123456"/>
After starting eXo Platform, you can connect to https://exo1.com:8443/portal. If you are testing with dummy server names, make sure you created the host exo1.com.
Configuring the Native Installer
Modify the $NATIVE_INSTALLER_DIR/apache-tomcat/conf/server.xml file as did with the $PLATFORM_TOMCAT_HOME/conf/server.xml file when configuring eXo Platform Tomcat.