Warning
You are looking at documentation for an older release. Not what you want? See the current release documentation.
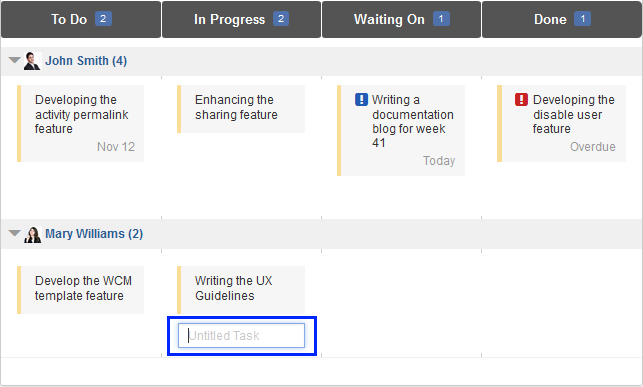
This view is designed only for projects, therefore you need to go to a specific project to see this view. In this view, you can manage tasks as well as the project workflow:

In which:
Each column corresponds to a status of the project workflow.
The color of a task card depends on its priority: High - Light Red, Medium/Normal - Light Orange, Low - Light Green, None priority - Light Gray.
The number of tasks in a column is displayed next to the status name.
In addition to creating new tasks by this way, you can quickly do this via the Board view as follows:
Hover cursor over the last task of a column (or grouping), an editable field will appear:

Type the task title in this field, then press Enter key. Your new task will be created immediately in the corresponding column.
Sorting/Grouping tasks:

You can sort these tasks by the Due Date, Priority and Rank options as well as group them by the Assignee, Label and None options as in this view.
Moving tasks
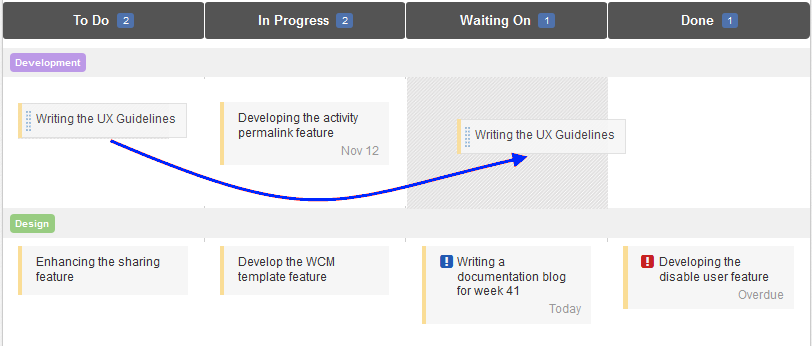
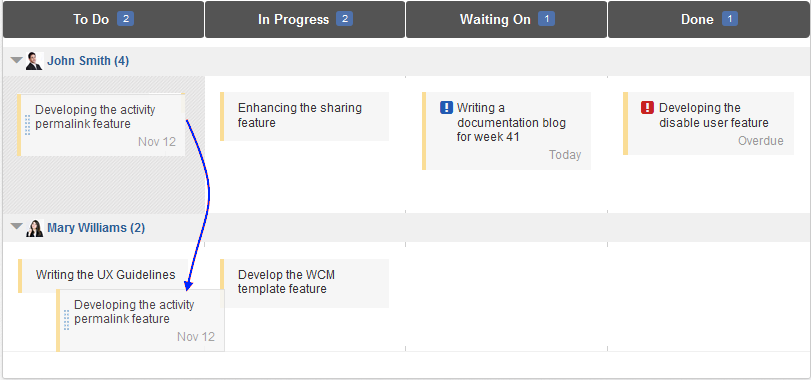
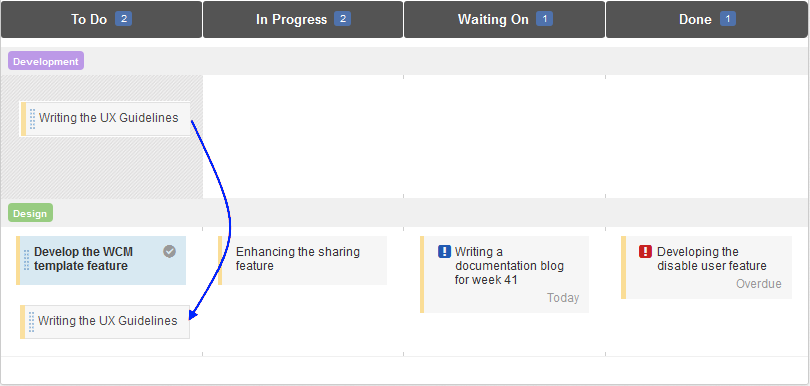
You can drag/drop tasks back and forth between assignees, labels and statuses.
Between statuses:

Between assignees:

Between labels:

Managing project workflow
By default, your project will have a workflow with four statuses including To Do - In Progress - Waiting On - Done and you can change it on your own.
To modify a status, double-click the status name in the Board view, and type the new name in the editable field that appears:

Press Enter key to finish updating.
To delete a status, hover cursor over the status name in the Board view, and select the delete icon that appears:

Note
All tasks assigned to the deleted status are affected to the previous status (the column on the left in the Board view).
If the status is the first of the list (the first column in the Board view), the tasks will be assigned to the next status (the next column on the right in the Board view).
The last status cannot be deleted.
To add a status, hover cursor over the last status name in the Board view, and select the plus sign icon that appears:

Type the status name in the text field that appears, then press Enter key to finish.