Creating a new skin is not a simple topic because this task requires many steps to have a wished skin for your product. There are many options for you to create a new skin that depends on your various demands. A typical procedure of creating a new skin can be done via the extension mechanism provided by eXo Platform as follows:
Step 1. Creating a new skin web archive
To create a new skin (called "MySkin"), you should create a new skin web archive, for example, MySkin.war with the following structure:
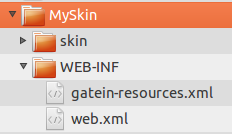
The
skinfolder contains images and stylesheets of your skin.The
WEB-INFfolder consists of two files:gatein-resources.xml: The eXo Platform skin configuration file which will define your new skin (for site, portlet or portlet windows).web.xml: The file that you will defineResourceRequestFilter. See the sample content here.
Note
To get a new site skin declared in gatein-resources.xml loaded successfully, the display-name
of the extension webapp (in web.xml) should be identical to the context path of the extension webapp.
Step 2. Configuring the site skins
Note
You can find the default eXo Platform skin configuration in the $PLATFORM_TOMCAT_HOME/webapp/eXoResources.war/WEB-INF/gatein-resources.xml file.
Specify the new portal skin in your own configuration file, for example,
WEB-INF/gatein-resources.xmlinMySkin.war.Specify the name of the new skin and the path to its CSS file.
<gatein-resources>

    <portal-skin>

        <skin-name>MySkin</skin-name>

        <css-path>/skin/myskin.css</css-path>

    </portal-skin>

</gatein-resources>
The
skin-nametag specifies the new skin name.Note
eXo Platform comes with the default skin named Default, so you should give a different name for your new skin.
css-pathspecifies the path to theMySkin.warcontext, pointing to the CSS file which defines your new stylesheet rules. See Step 4. Skinning the site for more details.
Step 3. Registering web context as an extension
After creating MySkin.war, you need to register it as an extension to make your portal know that this war contains the new portal skin configuration.
Create a
.jarfile in$PLATFORM_TOMCAT_HOME/lib, for example,myskin-configuration.jar, with the following structure: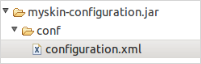
Add the following snippet to the
configuration.xmlfile.<configuration>
<external-component-plugins>
<target-component>org.exoplatform.container.definition.PortalContainerConfig</target-component>
<component-plugin>
<name>Change PortalContainer Definitions</name>
<set-method>registerChangePlugin</set-method>
<type>org.exoplatform.container.definition.PortalContainerDefinitionChangePlugin</type>
<init-params>
<object-param>
<name>change</name>
<object type="org.exoplatform.container.definition.PortalContainerDefinitionChange$AddDependencies">
<field name="dependencies">
<collection type="java.util.ArrayList">
<value>
<string>MySkin</string>
</value>
</collection>
</field>
</object>
</object-param>
</init-params>
</component-plugin>
</external-component-plugins>
</configuration>
The eXo Platform skin contains the site skin and default portlet skins. The site skin is considered as the system skin and it is shared to all portlets and system components. Your new skin will completely replace the default site skin, but it is not easy to re-write the whole site skin, so it is recommended that you clone the default one, then add or replace its parts. There are two ways to clone the default skin of eXo Platform:
Using LESS to build skins for eXo Platform. You will need to use Less compiler to build them to a CSS file, which will be deployed in a
.wararchive, and configure<css-path>in thegatein-resources.xmlfile, pointing to the CSS file. See the Default skin for more details.Using CSS: you can find eXo Platform stylesheets in
eXoResources.war/skin/which contains bootstrap and the core stylesheet, and in the following war files which contain the /skin folder and are written as eXo Platform skin extension, includingeXoWCMResources.war,CommonsResources.war,social-resources.war,forumResources.war,wiki.war, andeXoPlatformResources.war.
Tip
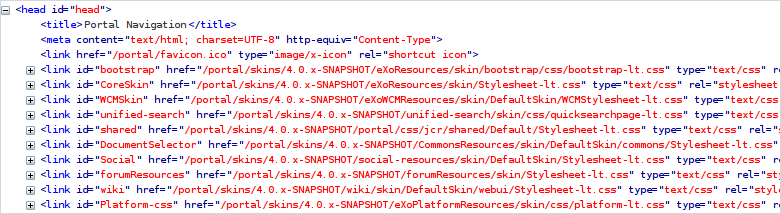
After starting your portal, logging in and going to the homepage, you can see the site stylesheets file on the HTML
header of the page by using Firebug or any developer tools that allow seeing the HTML raw content. Every
<link> element with Id that does not contain "portlet" is eXo Platform site skin files.
Step 5. Skinning portlet windows
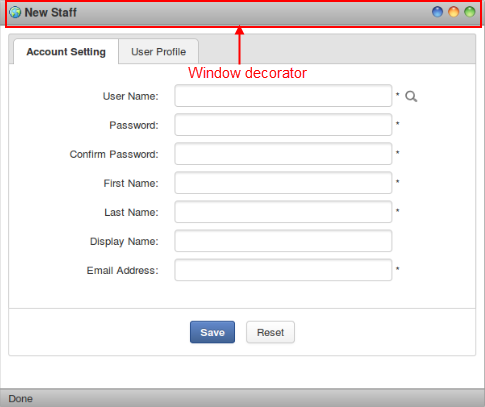
Portlet window is the CSS applied to the portlet window decorator. When the administrator selects a new application to add to a page, he can decide which style of the decorator will surround the window if any. The window decorator is a part of the portal system components that means the site skin stylesheets contain CSS rules for this.
Portlet windows are defined within the gatein-resources.xml file which is used by the SkinService to deploy the portlet windows.
The portlet windows can belong to a category of portlet windows.
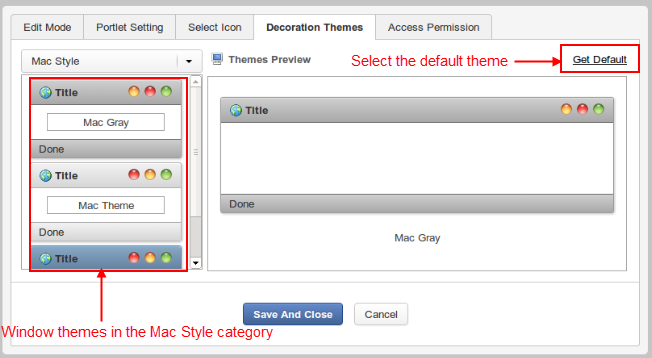
For example, the following
gatein-resources.xml
fragment will add
MacGray
and
MacTheme
to the
MacStyle
portlet windows category.
<window-style>

    <style-name>MacStyle</style-name>

    <style-theme>

      <theme-name>MacGray</theme-name>

    </style-theme>

    <style-theme>

      <theme-name>MacTheme</theme-name>

    </style-theme>

</window-style
You can find the default configuration of eXo Platform in TOMCAT_HOME/webapp/eXoResources.war/WEB-INF/gatein-resources.xml.
Note
You only need to declare your new style. The configurations for the default portlet windows are automatically inherited.
In order for the SkinService to display the window decorators, it must have CSS classes with the specific naming related to the portlet window name. The service will try and display CSS based on this naming. The CSS class must be included as part of the current site skin for the window decorators to be displayed.
You should clone the default eXo Platform portlet windows via two ways:
Using LESS: Find the window decorator LESS at skin/less/PortletThemes.
Using CSS: Find the window decorator CSS classes at
eXoResources.war/skin/PortletThemes/Stylesheet.css.
Defining new rules for a new theme
Add your new rules for your own themes.
For example, to define the name of a CSS rule for the "SimpleBlue" portlet window as follows.
.SimpleBlue .WindowBarCenter .PortletName {
	...
	}
The CSS selectors are prefixed with the ".SimpleBlue" class. You need to replace this
with your portlet window name, and change the rules to achieve your new portlet window design (color, size, and more).
Customizing the default portlet window
To customize the default portlet window of a site, you need to define the CSS classes for a theme called DefaultTheme.
Note
You do not need to specify the DefaultTheme in the gatein-resources.xml file.
Step 6. Using your newly defined skin
After having all the configuration above, and defined CSS rules, deploy myskin-configuration.jar and MySkin.war, and start eXo Platform.
Now you can change the site settings to use your newly defined site skin via UI when creating or editing the site.

Also, you can set your site as default by following steps here.