WYSIWYG stands for What You See Is What You Get. The WYSIWYG editor allows you to edit a wiki page directly in the Wiki markup language. This has the advantage of being faster than the Source Editor for content formatting tasks.
You can switch between the Source and WYSIWYG editors at any time by clicking  or
or  .
.
In the Source editor, which is selected by default when you edit a page, you have to use the wiki markup language for text formatting, while the WYSIWYG editor enables the content to be appeared during editing that is very similar to the published result. Thanks to available tools on this editor, you can format your content visually without using wiki markups.

Note
If the final result is not similar to what you wish when editing a page by the WYSIWYG editor, you can go back to the Source editor and use Wiki markups to edit the content.
When using the Source editor, examples of commonly used markups are displayed in a lateral panel with a link to the Full Syntax Notation page for more details.
To learn more about the WYSIWYG editor, you can refer to the WYSIWYG editor user guide.
You can insert an attached image or an external image by clicking
 on the text editor.

Inserting an attached image
Select Attached Image... from the drop-down menu.
Follow the steps in the Adding an attachment to a page section.
Inserting an external image
Select External Image... from the drop-down menu.
Insert the image URL into the input-text box.
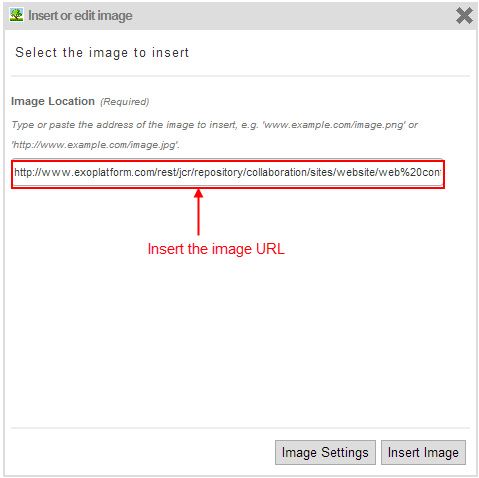
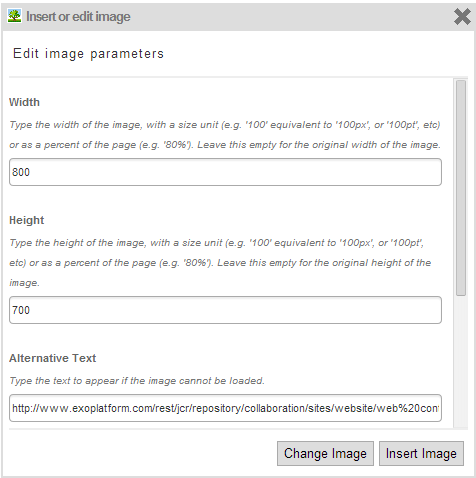
Optionally, edit the image parameters by clicking .
Click to accept inserting the external image into your Wiki page or click to select another image.
To attach files to a page, follow the steps in the Adding an attachment to a page section.
By using macros, you can apply extra formatting, functionality and customization to your content. You can easily add macro tags by using the Rich Text editor.
Switch to Rich Text editor.
Click Macro, then select Insert Macro... from the drop-down menu.

The Insert Macro form appears.
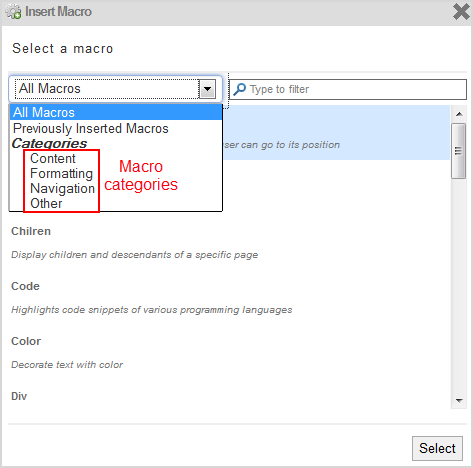
The macro is classified into different categories: Content, Formatting and Navigation and Other.
Select a macro category.
Select your desired macro from the selected categories list, then click the Select button, or simply double-click it. For example, if you select the Box macro, you will go to the macro parameters form.
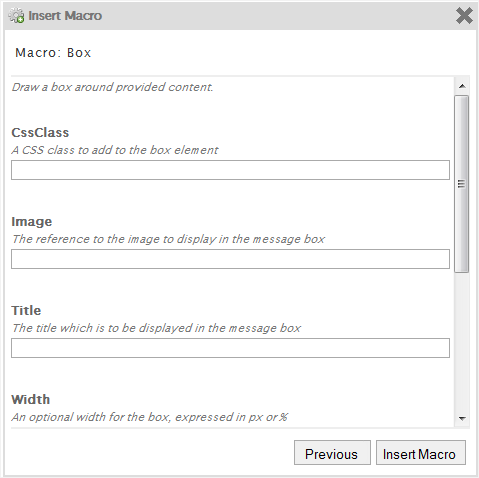
Enter parameters into the corresponding fields for your selected macro. Click Insert Macro to perform your macro insertion, or click Previous to return to the initial Insert Macro form.
Tip
Move up/down the scroll bar to see functional description of macros.
If you do not know how to use a syntax, you can use the Syntax Help function. The Syntax Help is displayed by clicking  from the page toolbar. When being clicked, a lateral pane beside the editing area will show all the Confluence syntax information. The lateral pane can be hidden by clicking
 ![]() in the upper right corner or by clicking again.
in the upper right corner or by clicking again.
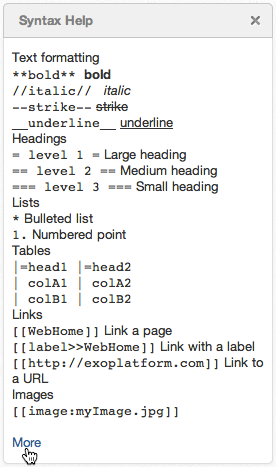
You can click  at the bottom of the short Help Tips form to open the Full Syntax Notation page.
You can insert icons, emoticons to emphasize the content. The usage is described in the Full Syntax Notation | Icon/Emoticon Support page with examples so you can easily remember and use them.